
Surely this will get fixed eventually, but as of the date of this post it’s still an issue and it’s pretty annoying. Yes, you can in fact do the following:
- Program the Raspi Pico via Arduino 1.8 or the new 2.0 IDE using the Arduino core library (in C, not MicroPython)
- Upload firmware via Arduino IDE without having the manually entering bootloader mode (BOOTSEL)
But, you may have run into the following error:
Failed Uploading: uploading error: exit status 1TLDR: Install the arduino-pico board package in Arduino 1.8 (don’t use the Arduino MBED RP2040 package). Do the first flash via Arduino 1.8 IDE, from then on you’ll be able to flash as usual from either IDE 1.8 or 2.0
Detailed Steps: (Windows 10)
A) Initial setup/flash in Arduino IDE 1.8
- Unplug the Pico if it’s plugged in
- You need to have Arduino 1.8 installed (the original IDE, update it if necessary)
- If you already instead any Pico/RP2040 boards in any board manager (1.8 or 2.0 IDE), uninstall them all
- Installing the arduino-pico board library
- Open Arduino IDE 1.8 as administrator
- File > Preferences, and under Additional Boards Manager URLS click the little box on the right. Add the following line
https://github.com/earlephilhower/arduino-pico/releases/download/global/package_rp2040_index.json
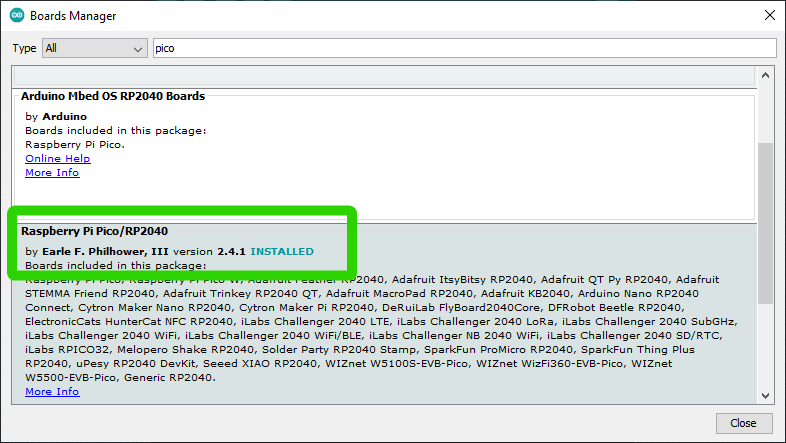
- Goto the Boards Manager (Tools > Board > Board Manager…), and type in pico in the search
- Select the Raspberry Pi Pico/RP2040 (do not select Arduino Mbed OS RP2040 Boards), click install
- Connect the Pico with USB in BOOTSEL mode (holding down BOOTSEL button while plugging in the USB cable)
- You can verify by opening up explorer, and the Pico will show up as a storage device (like a flash drive)
- Select Tools > Board > Raspberry Pi RP2040 Boards -> Raspberry Pi Pico
- Open the Blink example:
- File > Examples > 01. Basics > Blink
- Note: Don’t select a port like you normally would. In fact you shouldn’t be able to see the Pico as a port because we’re in BOOTSEL mode
- Press Upload
- Remove the Pico from USB, plug it back in
- To test, modify the blink code from 1000ms to 100ms
- Now under Tools > Port, you should see a COM port for the Pico, select it
- Upload the modified blink (it’ll ask you to save, just save somewhere then delete later)
- From now on, you should be able to upload to the Pico as you’re used to via Upload button
- You don’t need to start the Arduino 1.8 as administrator each time, we just did this during the install of the arduino-pico core.
B) Using Arduino 2.0 IDE
- If you haven’t already, download install Arduino 2.0 (link Get the
exeormsi) - That’s it, it should work. As before, and as is typical:
- Select Tools > Board > Raspberry Pi RP2040 Boards -> Raspberry Pi Pico
- Select Tools > Port > THE_COMPORT
- Upload your sketch
That’s pretty much it!